Not a graphic designer? No worries! Book Cover Design Tips Comin’ At You…
Even if you’re not a professional designer or graphic artist, I want to give you some solid book cover design tips and tools!
If you want to learn about…
• Writing a book for the first time? (click here)
• How to Format a Book for Amazon Book Publishing (click here)
More topics coming soon! But in the meantime, let’s dive into how to design your book cover!

Designing Your Book Cover
Ideally, you just want to design your cover ONCE. Or rather, you want to make it as easy as possible to turn your e-book cover into a print cover.
That’s why these cover guidelines match the KDP print requirements.
If you’re for-sure publishing a physical book in addition to an e-book, it might be tempting to design your book cover before you’re finished with all the nitty-gritty formatting stuff above.
But DON’T DO IT. That way lies pain and heartache. You need to have the trim size and spine width LOCKED DOWN before you venture into the world of book covers.
That being said, if you only want the Kindle version, you can skip the spine and the back, and design your cover at any point in the formatting process.
Let’s venture.
1. Book Cover Design: For an e-book in Amazon’s Kindle
Extra Info Source: “Create an eBook Cover” from Kindle’s site
Unlike the images inside your book, your e-book cover MUST be RGB (not CMYK), and should be saved as a JPEG or a TIFF file at 72 DPI.
The ideal ratio for an e-book cover, according to Amazon, is a height/width ratio of 1.6:1. Basically, what that means is that for every 1,000 pixels in width, the image should be 1,600 pixels in height.
And hey, as it turns out, both 5.5”x8.5” and 6”x9” are pretty close to this ratio! Sweet.
Remember–for your e-book cover, you’re only designing the front. No need to worry about the spine or the back for this one.
2. Book Cover Design: For a printed book using Amazon KDP
Extra Info Source: Set Trim Size, Bleed, and Margins
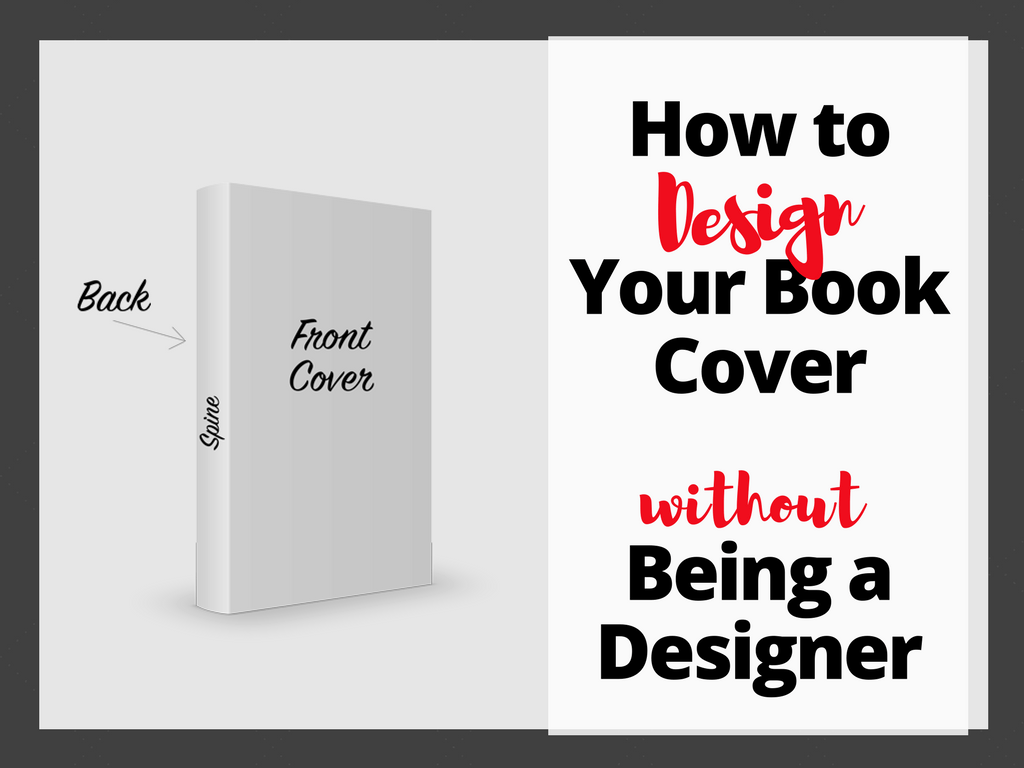
Your cover must be a single PDF formatted to the trim size of your book, which includes the back cover, spine, and front cover as one image.
But how big does that image need to be? Here’s how to figure it out.
How To Figure Out Your Book’s Cover Size
Unlike your book’s interior, your cover ABSOLUTELY needs a bleed–there’s no choice here. Why? Because it’s all a picture, and you’ll definitely have something extending to the edges, even if it’s a solid-colored book.
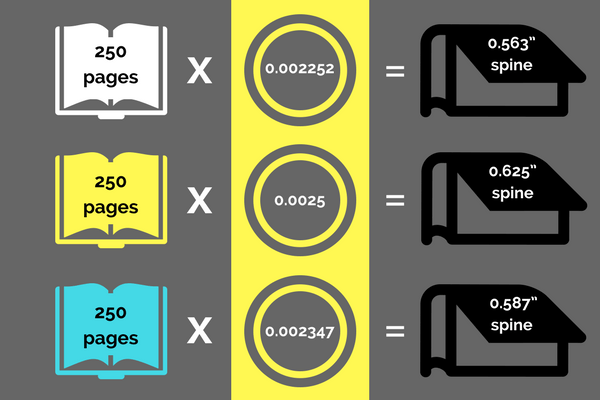
Step 1: Calculate the spine size of the book

The size of your spine depends on how many pages are in your book (which you know now, precisely, because you just formatted your book interior!).
- If your interior is black and white (no color), and you’re printing on white paper, multiply your page count by 0.002252”. (So a 250 page book would have a spine width of 0.563”)
- If there’s no color in your book and you’re printing on cream paper, multiply your page count by 0.0025”. (In this case, a 250 page book would have a spine that’s 0.625” thick.)
- If your book is full color (unlikely, since this is an entrepreneurial book, but you never know), multiply your page count by 0.002347”. (So a 250 page color book would have a spine width of 0.587”.)
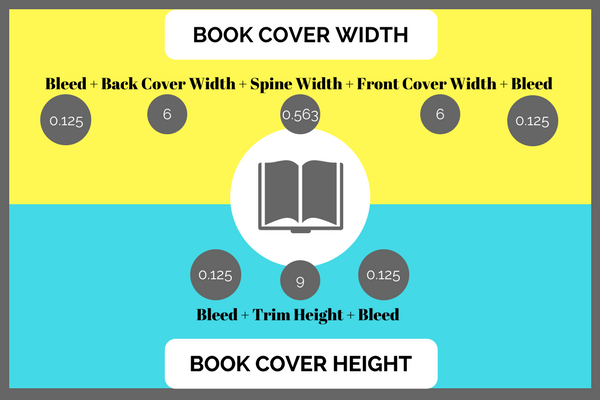
Step 2: Calculate the full book cover size
You will calculate the fully formatted cover size using the spine width calculation, the trim size width and height, and 0.125” bleed requirement using the following equations:
- Cover Width = Bleed + Back Cover Width + Spine Width + Front Cover Width + Bleed
- Cover Height = Bleed + Trim Height + Bleed
Example Calculation: 6” x 9” trim size with 60 B&W pages on white paper:
- Cover Width = 0.125” + 6” + 0.135” + 6” + 0.125” = 12.385”
- Cover Height = 0.125” + 9” + 0.125” = 9.25″
Book Spine Text
Amazon has a rule of thumb–don’t put spine text on your book if it’s thinner than 100 pages.
And because there can be variations in how the book cover is folded, allow for some variance–specifically, 0.0625” on either side of the cover’s fold lines.
For example, if your spine is 0.75” thick, your text shouldn’t be thicker than 0.625”.
Your Book’s Barcode

Kindle Direct Publishing has a system for automatically adding a barcode to the back of your book, so keep it in mind while you’re designing the back cover.
They put it in a space 2” wide, 1.2” tall, and 0.25” from the bottom of the cover, and the edge of the spine.
If you have a specific place you want the barcode to be, no problem–just make a white box 2” wide and 1.2” tall, and put it wherever you want the barcode to appear. Easy-peasy!
BOOK COVER DESIGN TIPS:
Designing the Front of Your Book
The front of your book should include, at the bare minimum, the book title, subtitle if relevant, and your author name. But also, it should look good, am I right?
You want people to scroll through Amazon, see your cover, and totally judge you by it–that is, judge that you’re a super-smart, business-savvy author who could tell you a thing or two about Insert Book Topic Here.
Also, though, cover design is tricky. It’s much easier to tell you the pitfalls to avoid than coach you (via blog post, even!) into a cover that will make seasoned graphic designers weep with joy.
What NOT To Do On Book Covers:
- No borders.
If you’re planning to use this cover for e-book AND print (which you should), the variation in print production will probably cause the border to be trimmed in a way that it looks uneven. Bummer! - No tiny text or tiny images.
The thumbnail’s going to be tiny on Amazon, so it just won’t play very well. - No all-white background.
I know, I know, minimalists everywhere are crying. But white backgrounds blend into Amazon’s background, which makes all your hard work literally disappear. - No hard-to-read fonts.
Pretty intuitive. If you find a gorgeous cursive font and you’re not totally sure if it’s readable, ask a couple people. If they pause for longer than two heartbeats, change the font. - No cheesy stockphotos.
If you find a good, free stockphoto, chances are that you’re not the only person in the world who’s used this for a book. So be careful not to look the same as everyone else.- Also, most good free stockphotos are labeled under a non-commercial license, so using it as a book cover would definitely violate that!
- Look for CC0 license if you go the stockphoto route…favorite sites of mine are:
- Pixabay.com
- Pexels.com
- FancyCrave.com
- And BigStockPhotos.com isn’t free but their quality and selection is amazing.
What To Do For Book Covers, YES!:
In truth, every design situation is a little different. Instead of a rote checklist, this is more “Here are some design possibilities to consider.”
This blog article from CreativIndie does a great job with breaking down typical book design cover tricks, including leaving a lot of space, using high contrast, and a section on non-fiction books specifically:
“Non-fiction appeals to the brain. You want an instantly clever image to catch their [the audience’s] mental attention. Non-fiction covers should have a central “gimmick” and a solid color background or gradient…You catch the brain’s attention by showing a juxtaposition – things that shouldn’t really go together and are unexpected. Then the subtitle tells them what the book is about.”
— Derek Murphy, CreativIndie
An Age Old Debate: Should You Put Your Face On The Cover?

Some might argue, who BETTER to put on your book cover?
At the end of the day, like many other book-formatting steps, this is your decision.
The super watered-down advice you’ll hear over and over again is, “Well, unless you’re Oprah, or some other superstar, your face isn’t going to help sell books.”
This is true. But consider the following.
- Are you trying to build a brand as a speaker?
- Do you ultimately want to make videos or a TV show, and regularly be in front of a camera?
- Are you comfortable in front of a camera?
- Are any of these statements things that people have said to you a non-zero amount of times?
- “Oh my god, you’re such a ham!”
- “Wow, you photograph really well! You’re always so photogenic.”
- “You just always look so good/stylish/professional/put-together!”
Why did you write this book in the first place? Not to instantly sell a million books. You wrote it to further your own goals, and to build your credibility in your niche.
If your goals are to be in front of a camera and/or crowd in the not-too-distant future, then having your face on your book (provided it’s a good picture and a well-designed cover) will ultimately make you more recognizable.
If your goals are more behind-the-camera oriented–like, you’re writing this book to check off a bucket list item and to give you more clout when you’re pitching copywriting projects to new clients–then a photo of you on the cover won’t make as much of a difference. It doesn’t align with your goals in the same way.

Here I am in front of a camera. Werk it.
Designing the Spine and the Back
The spine should have, at minimum, the book title, and your last name. (But remember–if your book is shorter than 100 pages, KDP doesn’t want you to add spine text.)
That’s it for the spine!
Don’t overthink it.
The back of the book is the real meat–that’s where people will get when they’ve decided your cover is intriguing. Since you’ve already proven that you’re interesting enough to click on, this is where you need to prove your credentials.
Specifically, you’ll need to answer two questions in your potential customer’s head:
- So why are you such an expert?
- Who agrees with you?
Back-of-the-Cover Question #1: So Why Are You Such An Expert?
The back of the book should have an engaging summary of the book–an elevator pitch, if you will.
This is where you pull out all the most dazzling, shiny, impressive, tantalizing parts of your book. It’s where you gently tease bits of your method, and show off your personality.
You’ll also need an author photo–preferably the headshot you use elsewhere in the other parts of your business, so you have some brand cohesion. This author photo should look professional, and, if possible, humanize you a little bit.

This lady totally looks like she’s about to explain EXACTLY why she’s such an expert.
Back-of-the-Cover Question #2: Who Agrees With You?
Let’s say you’re meeting a friend (Emily) you absolutely adore at a coffee shop.
The day before, she texts you and says her wonderful childhood friend (Anna) is going to be in town that day, and would you mind if she came along to the coffee shop?
You already love Emily, and if she’s saying Anna is this wonderful childhood friend, you’re already primed to love Anna too! So you’re way more likely to say yes, and to go into the coffee shop with a positive mindset.
Maybe after talking for ten minutes, you realize you get along super well, and you unexpectedly gain a lifelong friend.
Now imagine you were standing on a sidewalk, waiting for the crosswalk light to change, and happened to be standing next to Anna.
You wouldn’t know who she was, or anything about her, other than the clothes she was wearing. She’s the exact same Anna who could be your lifelong friend–but without an endorsement from Emily, or a major stroke of luck, you’ll probably never find out.
This is why you need social proof.
These are your endorsements from reputable people and organizations.
“Social proof” is like getting an introduction to your audience from a mutual friend.
If you have claims to fame, this is where you weave them in; for example, if you got an impressive fellowship, grant, or other fancy-sounding awards.
These are all giant flashing neon signs that say “Some panel of judges decided that I am at least a little bit more of an expert than many other people.”
If you have reviews of the book from big names, put them on the back! When a successful author/speaker/etc. says they love your book, they’re linking their brand with yours. Readers are unconsciously thinking of all the positive associations they have with the reviewer, and it influences the way they think of you and your brand.
Also, if you interviewed big names for your book (even if they’re really only “big names” in your niche…hey, remember, you’re writing this book for your niche!), then that might be big enough to go on the front cover.
Example: “Including interviews from Tim Ferriss and Neil Patel.” (Ugh–the dream, right?)
Sidenote: If you’re wondering how to get reviews from big names, you’d be surprised what a polite, non-pushy email can do!
Remember, everyone who’s “made it” was once in your shoes. Someone helped them out, once upon a time. Chances are–if they have time!–they’ll want to help you, too.
BOOK COVER DESIGN TOOLS
Okay, we’ve covered literally everything else. Now, how are you going to get this cover designed? Here are potential tools you can use–from your own two hands to someone else’s.
BOOK COVER DESIGN TOOL #1: KDP Book Cover Creator
With KDP, you can design a paperback OR an e-book cover (or both!) for free, with a fairly intuitive tool. And it’s an easy way to be sure you’re getting something that fits ALL their specifications.
Some cons–it’s easy for it to look cheesy! In fact, it’s almost impossible to make something that looks genuinely very good.
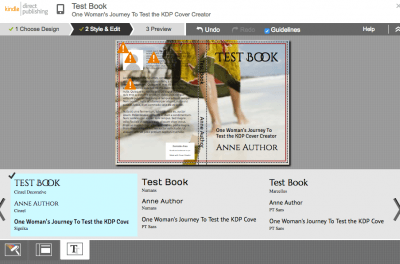
This is about as good as it gets, people.
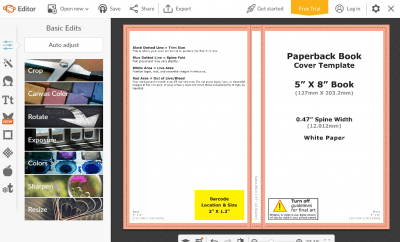
BOOK COVER DESIGN TOOL #2: Free Software
You can download one of Amazon’s templates and use them as design guidelines in most free online photo editing programs.
Just calculate your full book cover size (see the “How To Figure Out Your Cover Size” section), open up a new document that’s the right size, and upload the template.
Design on top of the template, and delete it when you’re done. You can change the transparencies of the objects on top to make sure everything falls in the right lines!
When you’re all done, make sure you save it as a PDF.
Other Free Book Cover Design Software:
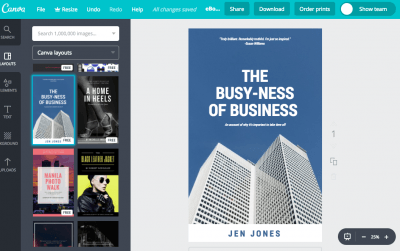
Also worth noting about Canva–they have an e-book cover tool, specifically.
Canva’s book cover designs are all 1410 by 2250 px (14.688 x 23.438 in). This abides by the 1.6:1 rule that I mentioned earlier, and, again, it’s a pretty similar ratio to a 5.5″ x 8.5” book.
They’re beautiful, free, and fairly customizable–but may not work for every situation.
BOOK COVER DESIGN TOOL #3: Subscription Software
If you have an eye for design and you already know how to use ‘em, then Adobe Photoshop, Illustrator, and/or InDesign are absolutely going to be your best bet. They’re industry standard and hugely versatile.
That being said, they also cost $50/month–unless you’re just using a single app, in which case it becomes $20/month.
And there is a very steep learning curve. If you’re not already part of the Adobe family, this is not the moment to join.
BOOK COVER DESIGN TOOL #4: Outsource It
Hey, when it comes down to it, your cover is a HUGE DEAL. It’s what people are going to use to judge your book’s credibility in the first two seconds that they see it.
Sometimes it’s better to have a professional take a swing at it.
Like with editing your book, websites like Upwork, Fiverr, FreeeUp, and Thumbtack let you hire freelancers in the blink of an eye without breaking the bank.
99 Designs is another one that’s design-specific, and they offer gorgeous covers, but at a little higher price–they start at $299. If you have the cash and you want the quality, though, it might be worth considering.

Congrats! Here’s what we covered (no pun intended) ;)…
Book Cover Design for Your Non-Fiction Book
- To get the size of your cover, calculate the spine size, and then use that to calculate the full cover size.
- Should you put yourself on the book cover? If you want to be a speaker and/or a camera personality, yes! Otherwise, maybe not. Ultimately, it’s your decision–consider your goals as you decide.
- Use social proof (testimonials, quotes, and big-name interviews) to demonstrate the value of your book.
- If you DIY your book cover design–download a free template that matches your trim size, and upload it to the (free!) design program of your choice.
- Outsource your book cover design with a freelancer from Upwork, Fiverr, FreeeUp, and Thumbtack
Great! What should you do now?
HOMEWORK: Take 30 minutes and start sketching out ideas or searching for book cover designs that catch your eye!
Want More?
1. Awesome Facebook Community:
• Best Selling Author Posse
• (100% free. Tons of support & accountability through your journey!)
2. FREE Training:
• How to Write a Best-Selling Biz Book As a 1st-Time Author, In Under 8 Weeks, & $0 in Ads
• (Once you’re ready for more inspiration and details!)
—
I’m so excited for you!
And of course, if you have questions or stories from your book cover design process, please feel free to drop me a line–always.
💕 LaptopLaura
Photo Credit: //Aaron Yoo//rawpixel.com//Jessica Ruscello//BobvdK//Chiara Marra//Eye for Ebony//